How to Paint Kitchen Cabinets So They Look Sprayed, Not Brushed
The short answer: to paint kitchen cabinets so they look sprayed, remove and label the doors, degrease everything, scuff-sand, prime with a bonding primer, apply two thin coats of a cabinet enamel, and let the finish cure before you use the kitchen hard. The rest of this guide explains each step and why it matters.
Painted cabinets fail for boring reasons: grease left on the doors, primer that never bonded, or a family that started slamming doors two days after the last coat. Get those three things right and a DIY job can look and wear like a professional one.
This guide walks through the same order of operations a refinisher uses.
How long does it take to paint kitchen cabinets?
Budget a long weekend of hands-on work for a small kitchen, and plan on the kitchen being partly out of service for about a week while doors dry and the enamel hardens. Most of that time is waiting on recoat and cure times, not painting (see Step 6).
How long between coats, and before you can use the cabinets?
The numbers below are from Benjamin Moore’s technical data sheet for ADVANCE Interior Paint (791), checked October 31, 2026. Other cabinet enamels differ, so use your own product’s data sheet.
| Milestone (Benjamin Moore ADVANCE) | Time on the data sheet |
|---|---|
| Dry to touch | 4-6 hours at 77°F and 50% relative humidity |
| Ready for the next coat | 16 hours at 77°F and 50% relative humidity |
| Light, careful use | Not before 5-7 days; no heavy abrasion until then |
| Optimum hardness and final sheen | Can take up to 30 days, depending on weather and drying conditions |
| Minimum temperature to apply | 50°F |
Because door backs and fronts are painted separately (Step 5), two topcoats means four rounds on the doors. At a 16-hour recoat, the topcoats alone take two to three days, before any cure time.
From our jobs: we have done close to 500 kitchens. The finish problems we see most come from two things: doors that were not cleaned and prepped properly, and coats that were not given enough time to dry before the next one went on. The room matters too. Ventilation and temperature change how fast paint dries, so treat the times above as best-case numbers.
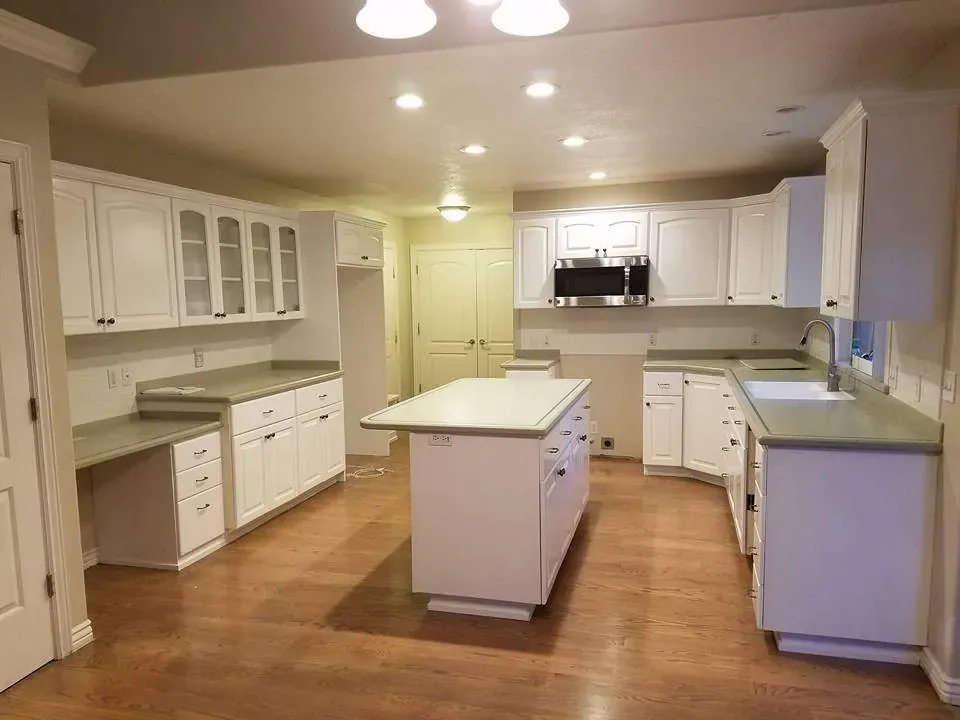
What do you need to paint kitchen cabinets?
You do not need a sprayer to get a good result. You do need the right primer and patience.
| Item | Why it matters |
|---|---|
| Degreaser (a TSP substitute or a cabinet-specific degreaser) | Kitchen grease is invisible and paint will not stick to it |
| 180-220 grit sanding sponges, 320 grit for between coats | Scuffs the old finish so primer can grab |
| Bonding primer (shellac-based for oak or stains, or a waterborne bonding primer) | The layer that actually holds everything on |
| Cabinet enamel (waterborne alkyd or urethane-modified acrylic) | Levels out and cures harder than wall paint |
| Quality 2-2.5” angled brush and a 4-6” foam or microfiber mini roller | Brush for profiles, roller for flat panels |
| Painter’s tape, labels, a drill/driver, plastic sheeting | Doors off, everything numbered |
| Optional: HVLP or airless sprayer | Faster and smoother, but needs practice and masking |
Bonding primer: a primer formulated to stick to slick, hard-to-paint surfaces (factory cabinet finishes, laminate, glossy paint) so the topcoat has something to grip. Shellac-based and some oil-based primers also block stains and wood tannins.
Cabinet enamel: a paint made for doors, trim and cabinets that levels out brush and roller marks and cures to a harder film than wall paint. Many are waterborne alkyds: Benjamin Moore, for example, describes its ADVANCE line as a waterborne alkyd that flows and levels like a conventional alkyd but cleans up with soap and water.
What we use on real jobs
The short answer: professionally, we use pre-catalyzed lacquer for both the primer and the topcoats. On painted cabinets that is typically one coat of pre-cat primer and two topcoats.
- Painted cabinets: one coat of pre-cat primer, then two pre-cat topcoats. Our primer does not change by wood type; oak, maple and other woods get the same primer.
- Stained cabinets: we usually skip primer. We lightly sand, then either put a new stain over the existing stain, or sand and go straight to a light topcoat. Then one or two clear topcoats go over the stain.
- Laminate and thermofoil: we generally avoid painting these. New doors or refacing the cabinets is usually the better fix.
Pre-catalyzed (pre-cat) lacquer: a solvent-based lacquer that comes with the catalyst already mixed in, so it cures harder than ordinary lacquer. It is a professional product: it is sprayed, the fumes are strong, and it is highly flammable. As one example, Sherwin-Williams' safety data sheet for a Sher-Wood pre-cat lacquer lists it as a highly flammable liquid and vapor, says to use it only outdoors or in a well-ventilated area away from sparks and flames, labels it for industrial use only, and warns that soaked rags and sanding residue can catch fire on their own if not stored in a sealed, water-filled metal container. You need a proper spray setup, ventilation and a respirator to use it safely.
Which brand of pre-cat lacquer? Brand matters less than what you can get locally. Mohawk is the one we have used the most. Sherwin-Williams and Benjamin Moore also make good lacquers, but which one makes sense depends on where you live and what your local suppliers carry.
What should a DIYer use instead?
If you do not want lacquer fumes or a spray booth, use a water-based cabinet enamel and a bonding primer. Several brands make good water-based options, so compare a few. Benjamin Moore ADVANCE, the waterborne alkyd whose data sheet we quote in this guide, is one example (researched, not a product we use on our jobs).
Step 1: Remove doors and drawer fronts, and label everything
Take off every door and drawer front, and remove hinges and pulls. Number each door with a piece of tape on the hinge cup hole or inside edge, and write the same number on a matching spot inside the cabinet box. Put each set of hinges and screws in a labeled bag.
Painting doors flat on a rack gives you a far better finish than painting them hanging. It also keeps drips off your countertops.
Step 2: Degrease like you mean it
Wash every surface you plan to paint, especially around handles and above the stove. Use a degreaser, then rinse with clean water so no residue is left behind. Let everything dry completely.
This is the step most DIY jobs skip, and it is the main reason paint peels near handles a few months later.
Step 3: Repair, then scuff sand
Fill dents and old hardware holes (if you are changing pull sizes) with a two-part wood filler, then sand flush. Scuff-sand all surfaces with 180-220 grit. You are not trying to remove the old finish, only to dull the shine evenly.
Vacuum, then wipe with a damp microfiber cloth or tack cloth to remove all dust.
Built before 1978? Test for lead before you sand. The U.S. Environmental Protection Agency says about three-quarters of US homes built before 1978 still contain some lead-based paint, and that sanding or scraping it can create dangerous lead dust. EPA's lead-safe certification rule generally does not apply to homeowners working on their own home, but it does apply to anyone paid to do the work, to landlords and to house flippers. If your cabinets are original to an older home, test the finish first and follow lead-safe practices if it is positive.
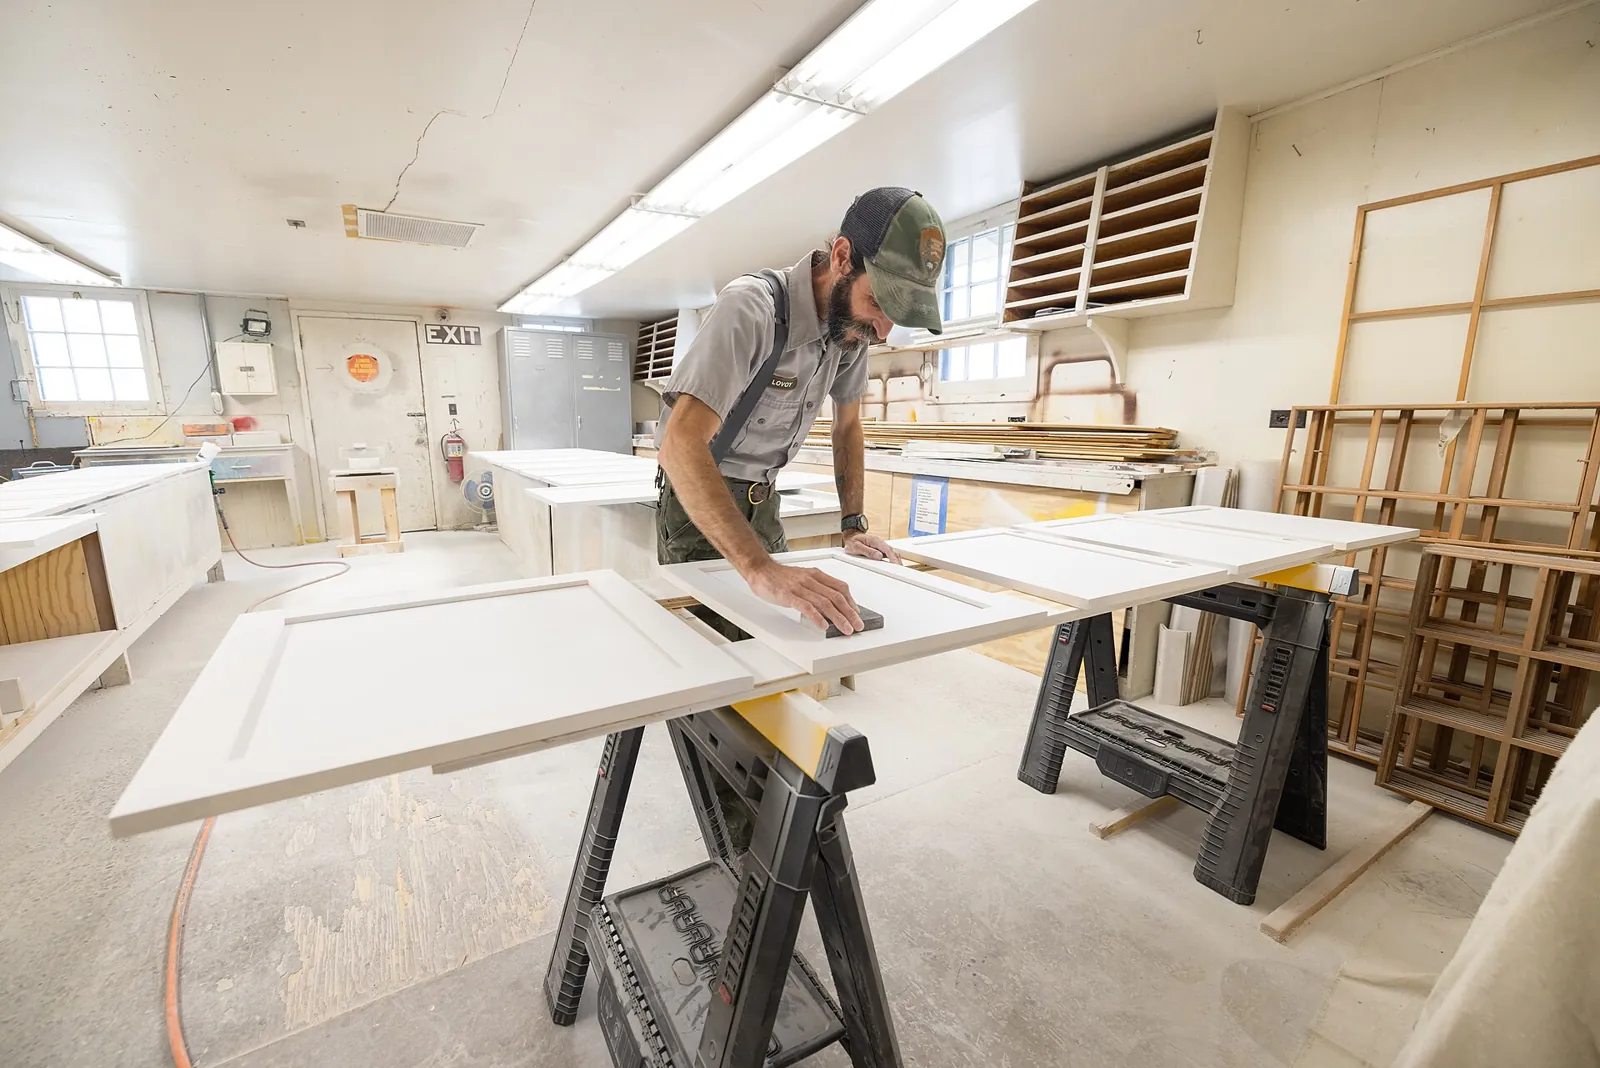
Step 4: Prime with a bonding primer
If you are painting, primer is not optional. (Clear-coating or restaining stained cabinets is different; see What we use on real jobs.) A bonding primer gives the topcoat something to grip on slick factory finishes. On oak, cherry, or anything with knots or water stains, a shellac-based primer also blocks tannin bleed, the yellow-brown stain that can creep through white paint.
Apply one even coat. Once dry, lightly sand with 320 grit, just enough to knock down any raised grain or dust nibs, and wipe clean.
Which primer should you use?
| Primer type | Best for | Trade-offs |
|---|---|---|
| Shellac-based | Oak, cherry, knots, water stains, smoke or grease stains; blocks tannin bleed | Strong odor, needs alcohol for cleanup, good ventilation required |
| Oil-based (alkyd) | Stain blocking and adhesion on previously painted or stained wood | Slower to dry, mineral-spirits cleanup, stronger odor |
| Waterborne bonding | Slick factory finishes, laminate and previously painted cabinets with no bleed-through risk | Low odor and soap-and-water cleanup, but weaker at blocking tannins and stains |
These are general characteristics of each primer family. The product’s own data sheet is the final word on what it sticks to and how long it needs.
Shellac-based primer is highly flammable. It is alcohol-based. As one example, Rust-Oleum's U.S. safety data sheet for Zinsser B-I-N lists it as a "highly flammable liquid and vapor" with a flash point of 17°C (about 63°F), and says to keep it away from heat, sparks, open flames and other ignition sources and to use explosion-proof ventilating and lighting equipment. In a kitchen, that means turning off gas pilot lights and the stove, keeping open flames and sparking tools out of the room, and keeping fresh air moving while you prime and while it dries. Read the data sheet for the exact product you buy.
On our jobs: we use the same pre-cat primer on oak, maple and other woods, and we usually skip primer on stained cabinets (see What we use on real jobs). The primer table above is general guidance for the water-based, brush-and-roll route. For laminate or thermofoil, we generally recommend new doors or refacing rather than paint. If you do paint it, a waterborne bonding primer made for slick surfaces is the usual choice.
Step 5: Apply two thin topcoats
Use a cabinet enamel, not wall paint. Cabinet enamels are formulated to level out brush marks and cure much harder.
- Brush the recessed profiles and edges first.
- Roll the flat panels and stiles with a foam or microfiber mini roller, then lightly tip off with the brush in one direction.
- Paint the backs of doors first, let them dry, then flip and do the fronts.
- Respect the recoat time on the can. Lightly sand with 320 grit between coats.
Two thin coats beat one heavy coat every time. Heavy coats sag and stay soft longer.
What sheen is best for kitchen cabinets?
| Sheen | How it looks | Cleanability on cabinets |
|---|---|---|
| Matte / flat | No shine, hides surface flaws | Hardest to wipe clean; rarely used on cabinets |
| Eggshell | Very low shine | Better than matte, still marks more easily |
| Satin | Soft, low shine | Wipes clean well; a common cabinet choice |
| Semi-gloss | Noticeable shine | Very wipeable; shows brush marks and dents more |
| Gloss | High shine | Most wipeable; shows every flaw in the prep |
Satin and semi-gloss are the usual cabinet sheens. Whatever you pick, choose it inside a true cabinet enamel rather than a wall paint.
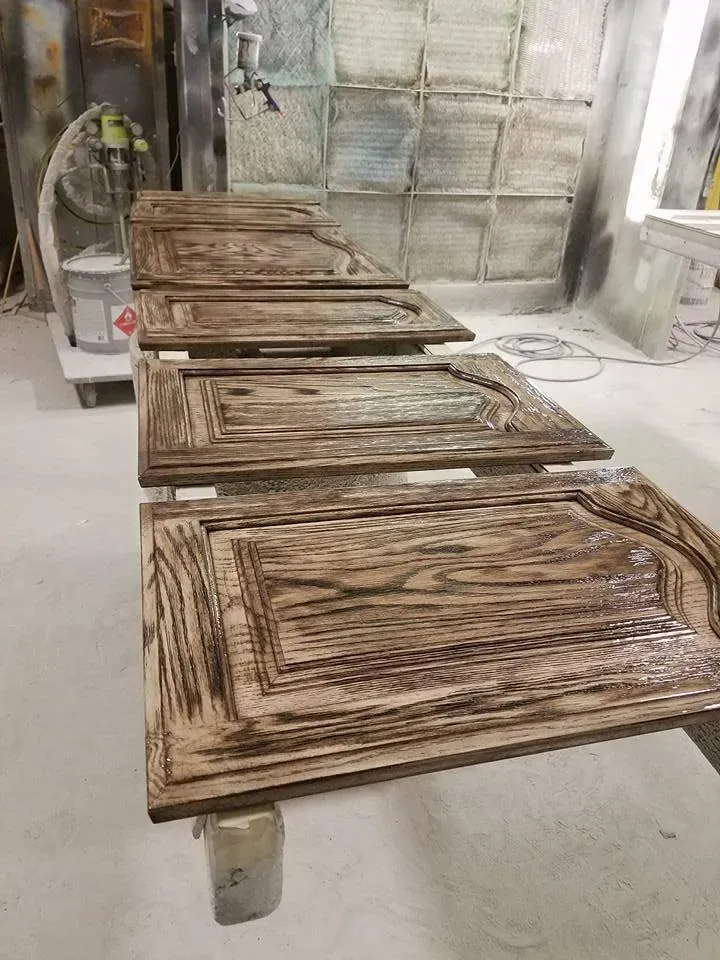
Should you brush and roll, or spray?
A sprayer gives the smoothest finish and is much faster on a full kitchen, but it takes practice, careful masking, and good ventilation. If this is your first cabinet job, brush-and-roll with a self-leveling enamel is the lower-risk choice. If you are doing multiple rooms or furniture pieces, a sprayer may be worth learning.
What we do on real jobs: we spray the doors as much as possible, because they are the most apparent, front-facing part of the kitchen and the place a brush or roller mark would show first. Rolling or brushing is sometimes acceptable on surfaces that get less attention, like bathroom vanity frames. If you only spray one thing, make it the doors.
Step 6: Let it cure before rehanging
Dry to the touch is not the same as cured. Most cabinet enamels feel dry in hours but take much longer to reach full hardness. Check the product data sheet for the manufacturer’s cure time. As one example, Benjamin Moore’s data sheet for ADVANCE lists 4-6 hours dry to touch and 16 hours before recoating at 77°F and 50% relative humidity, and says not to return shelves and tabletops to heavy use for at least 5-7 days. High humidity or cool temperatures stretch all of those times.
Rehang doors only once they no longer feel tacky and do not take a fingernail mark. For the first couple of weeks, be gentle: no slamming, no harsh cleaners, and use soft bumpers on doors so they do not stick to the frames.
Step 7: Reinstall hardware and add bumpers
Rehang doors by number, adjust hinges so gaps are even, and add clear bumper pads. This is a good moment to swap old pulls for new hardware.
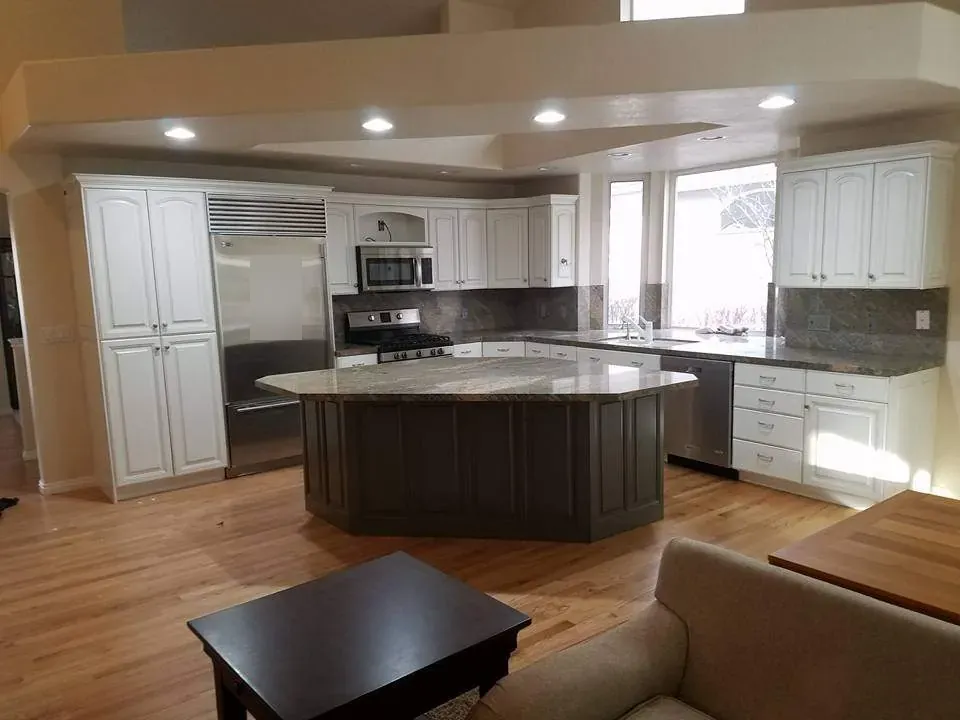
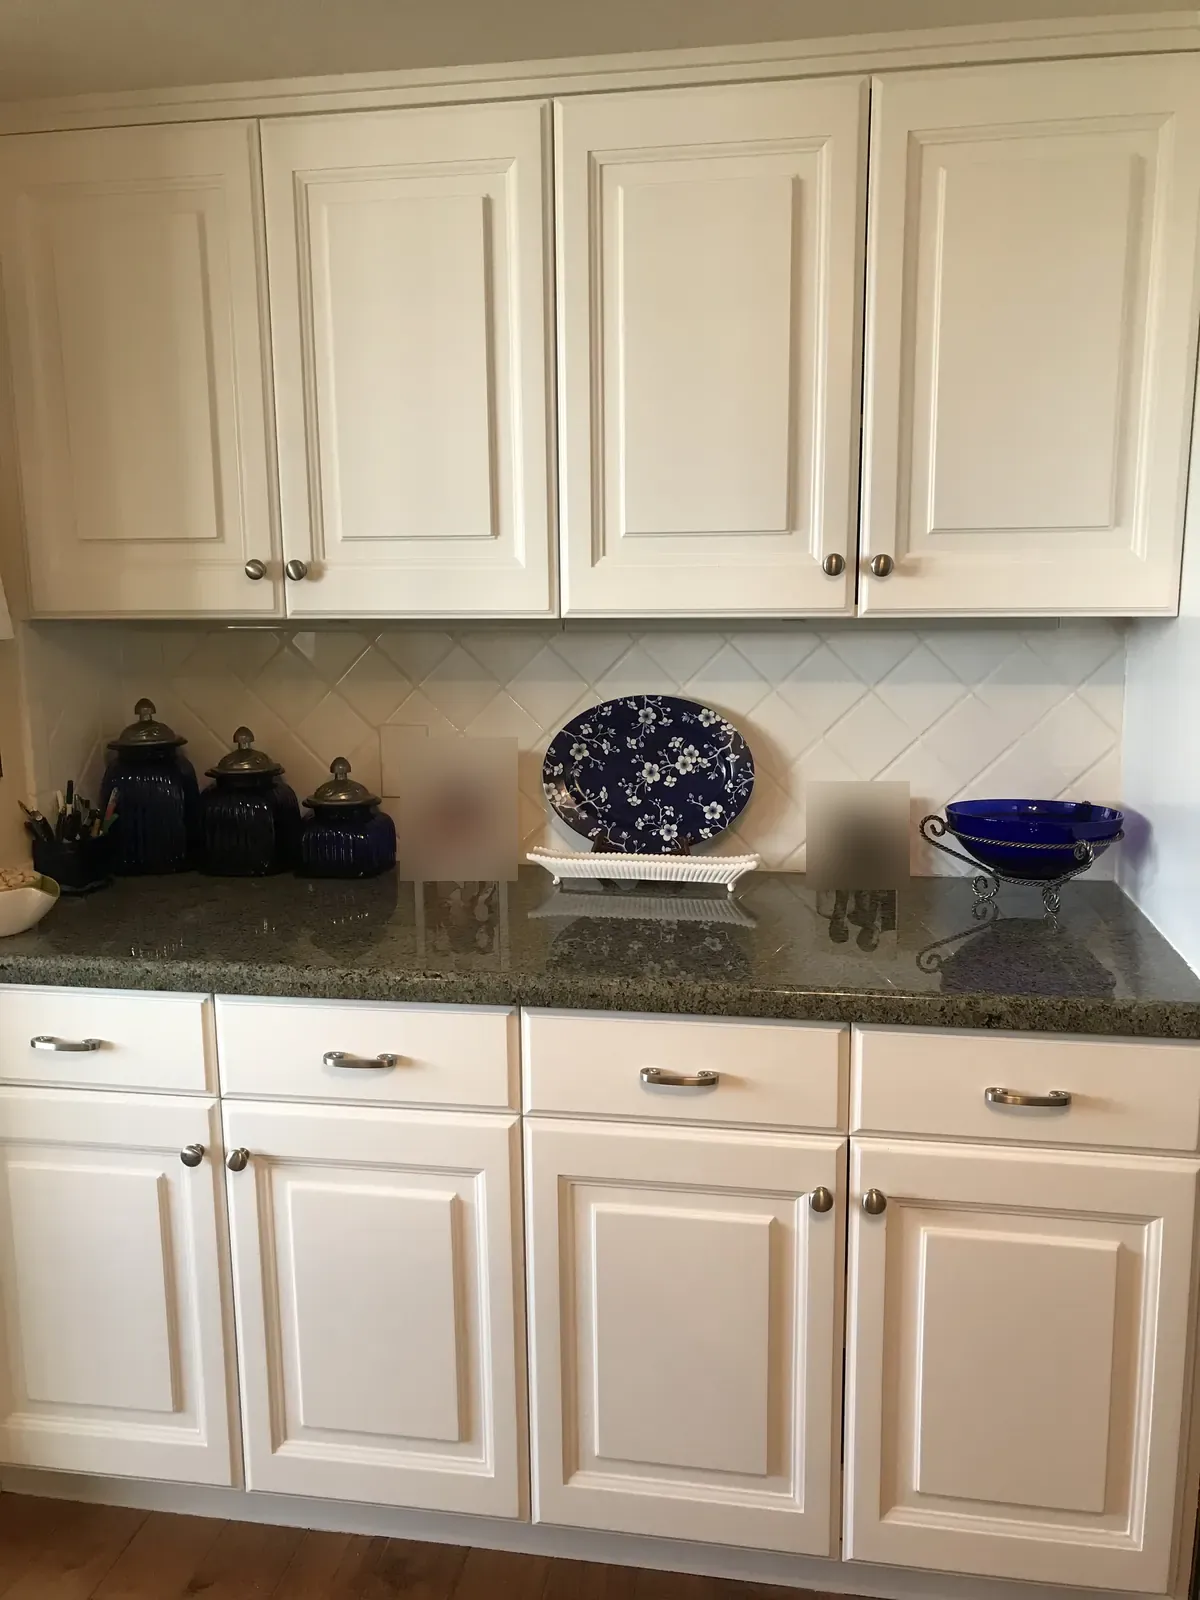
What colors work on painted cabinets? Ideas from real jobs
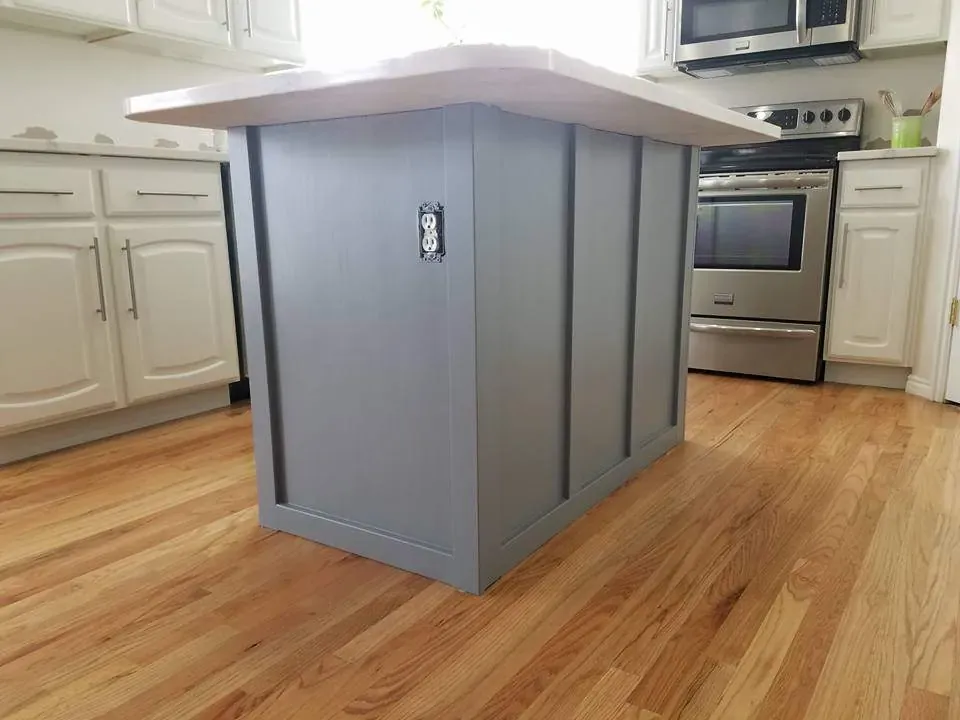
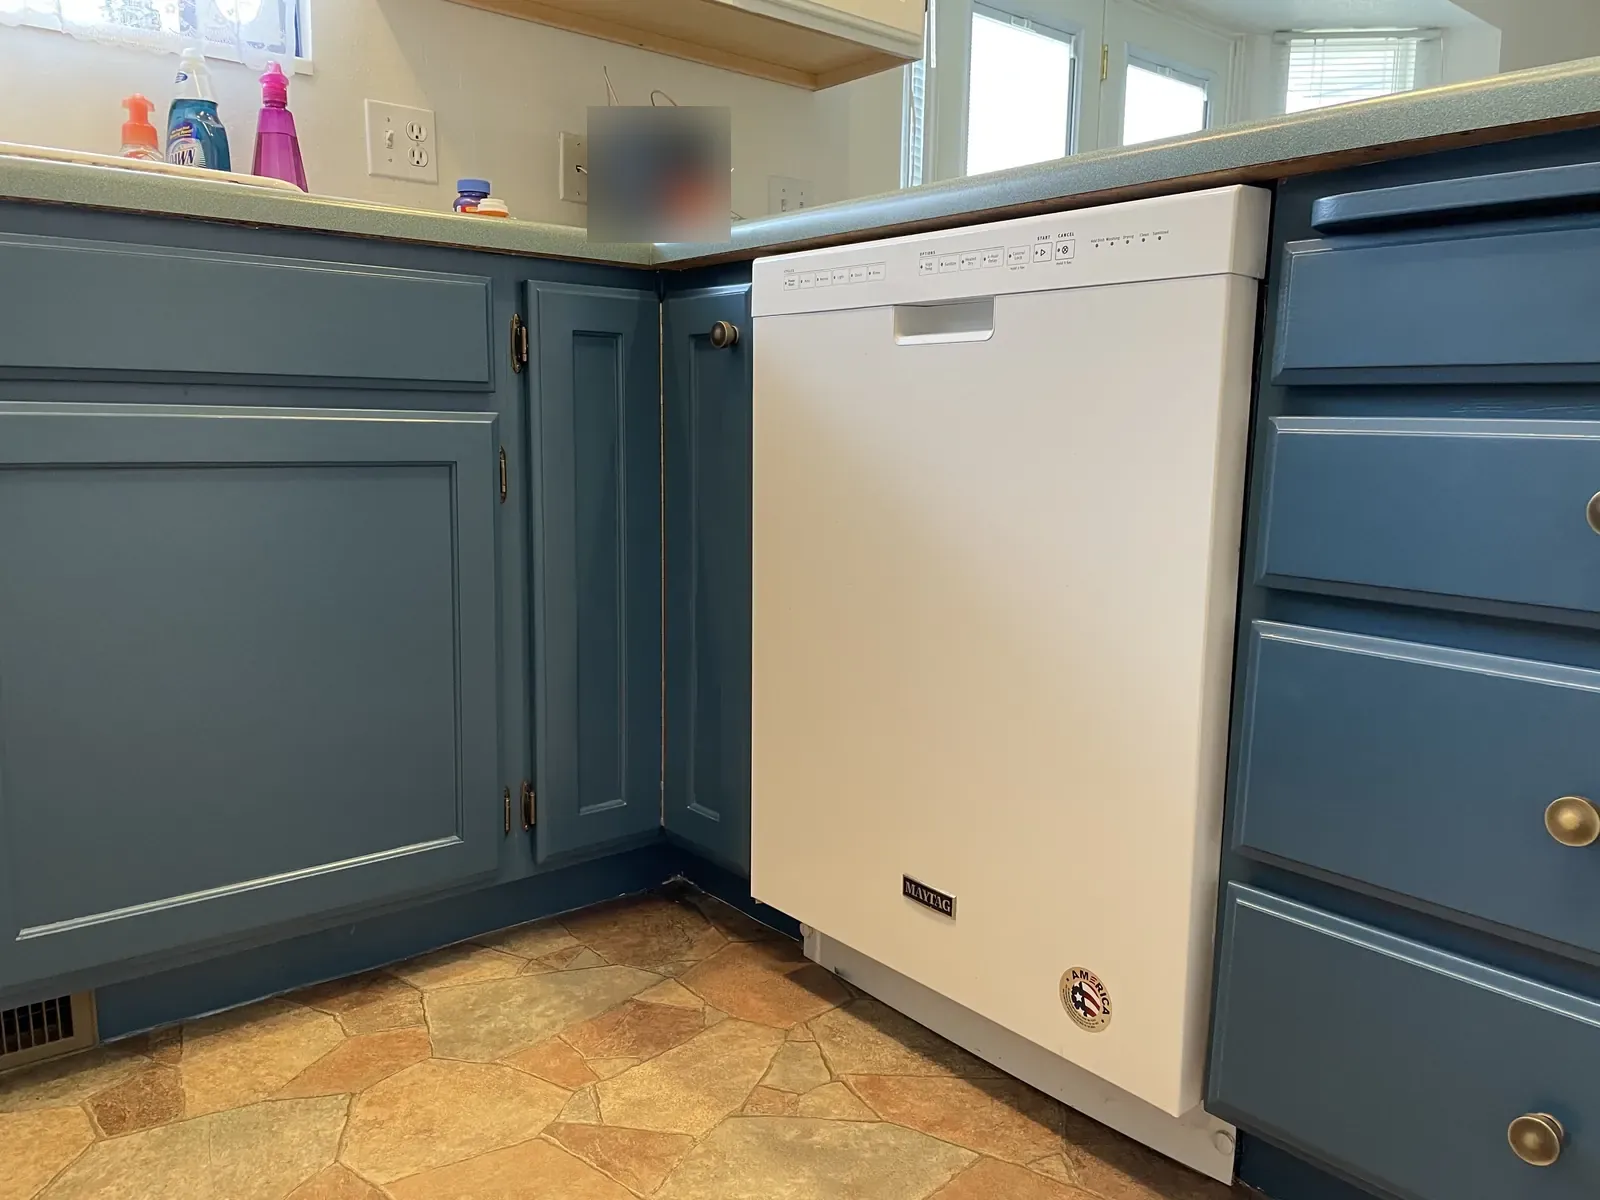
White is the safe choice, but painted islands and lower cabinets are where color works best.
What are the most common cabinet painting mistakes?
The short answer: across close to 500 kitchens, the two mistakes we see most are poor cleaning and prep of the doors, and not letting coats dry fully between coats.
The mistakes we see most
- Not cleaning and prepping the doors properly. Grease and grime around handles, plus a skipped or rushed scuff-sand, leave the primer nothing solid to grip. That is where peeling starts. Degrease, rinse, let dry, then sand and remove every bit of dust (Steps 2 and 3).
- Not letting each coat dry fully before the next one. A coat that feels dry can still be soft underneath. Recoating too soon traps that softness and leads to a finish that marks, sticks or wrinkles. Wait at least the recoat time on the data sheet (16 hours for Benjamin Moore ADVANCE at 77°F and 50% humidity), and longer when conditions are worse.
- Ignoring ventilation and room temperature. Both change dry times. The data-sheet numbers in the table above assume 77°F and 50% relative humidity, and ADVANCE should not be applied below 50°F. In a cold garage or a closed-up room with no airflow, expect every step to take longer.
Other mistakes to avoid
- Skipping the degreaser, which leads to peeling near handles.
- Using wall paint instead of a cabinet enamel.
- Skipping primer before painting, especially over slick finishes or water and tannin stains.
- Laying the paint on thick to finish faster.
- Rehanging and using the cabinets before the paint has cured.
When should you hire a pro instead?
If your cabinets are thermofoil that is peeling, badly water damaged, or you want a factory-smooth sprayed finish without the learning curve, a professional refinisher is often worth the cost. For everything else, the steps above will get you a finish you will be proud of.
Not sure which way to go? The cabinet project planner takes your door and drawer counts and compares DIY materials with published national price ranges for hiring a pro, adjusted for your state.
What to ask a refinisher before you hire
Whether you do it yourself or hire it out, the same things decide whether the finish lasts. Before you accept a quote, ask:
- Are the doors and drawer fronts sprayed? On our jobs we spray doors whenever possible, because they are the most visible part of the kitchen. (What we use on real jobs)
- What is the coating system, and how many coats? On painted cabinets we use one coat of pre-cat primer and two topcoats. Ask for the product names so you can read their data sheets.
- How are the doors cleaned and prepped, and how long does each coat dry? Poor prep and rushed coats are the two mistakes we see most. (The mistakes we see most)
- Is the firm EPA Lead-Safe Certified? If your home was built before 1978, anyone paid to do the work generally needs to be. (Step 3)
- What happens with laminate or thermofoil? We generally recommend new doors or refacing instead of paint.
If you are a painter or refinisher doing this for clients, see our first-hand comparison of Jobber vs Housecall Pro for painting and refinishing contractors.
Frequently asked questions
Do you have to sand kitchen cabinets before painting?
Yes, but only lightly. Scuff-sand with 180-220 grit to dull the old finish evenly so the primer can grip; you are not trying to strip it. Then remove all dust before priming. In a home built before 1978, test for lead before sanding.
Can you paint kitchen cabinets without removing the doors?
You can, but the finish is usually worse. Painting doors flat on a rack lets the enamel level out without sags or drips, keeps paint off the countertops, and lets you paint the backs and fronts separately.
What sheen is best for kitchen cabinets?
Satin and semi-gloss are the most common choices. They wipe clean more easily than matte or eggshell, while gloss shows every brush mark and dent. Pick the sheen inside a true cabinet enamel rather than a wall paint.
How long does cabinet paint take to cure?
Longer than it takes to feel dry. Check your product's data sheet: Benjamin Moore's ADVANCE, for example, lists 4-6 hours dry to touch and 16 hours to recoat at 77°F and 50% humidity, and says to wait at least 5-7 days before heavy use. Cool or humid conditions make it slower.
Should I brush and roll or spray my cabinets?
On our jobs, we spray the doors whenever we can, because doors are the most visible, front-facing part of the kitchen. Brushing or rolling can be acceptable on less visible surfaces, such as bathroom vanity frames. For a first DIY cabinet job, brush-and-roll with a self-leveling cabinet enamel is the lower-risk choice; a sprayer gives the smoothest result but takes practice, careful masking and good ventilation.
What is the most common mistake when painting cabinets?
In close to 500 kitchens, the two we see most are not cleaning and prepping the doors properly, and not letting each coat dry fully before the next one. Dry times also depend on ventilation and room temperature: a cool or stuffy room dries much more slowly than the data sheet's 77°F and 50% humidity, and Benjamin Moore lists 50°F as the minimum for applying ADVANCE.
What do professional cabinet painters use?
Many pro refinishers, including us, spray a pre-catalyzed (pre-cat) lacquer system. On painted cabinets we typically apply one coat of pre-cat primer and two topcoats. Brand matters less than what your local suppliers carry: Mohawk is the one we have used most, and Sherwin-Williams and Benjamin Moore also make good lacquers. Pre-cat lacquer is solvent-based and highly flammable and needs a spray setup and strong ventilation, so if you do not want lacquer fumes, several brands make good water-based cabinet enamels.
Can you paint laminate cabinets?
It can be done with a bonding primer made for slick surfaces, but we generally avoid it. On laminate or thermofoil, we usually recommend new doors or refacing the cabinets instead of painting.
Do you need primer on stained cabinets you are restaining or clear-coating?
On our stained jobs we usually do not prime. We lightly sand, then either put a new stain over the existing stain or go straight to a light topcoat, and finish with one or two clear topcoats. Primer is for painted, opaque finishes.
Do I need primer if I am using paint-and-primer in one?
When you are painting cabinets, yes. A dedicated bonding primer is what grips slick factory finishes, and a shellac-based primer also blocks tannin bleed from oak and cherry, which a paint-and-primer usually will not stop.
Sources
- Lead Renovation, Repair and Painting Program, U.S. Environmental Protection Agency
- ADVANCE Interior Paint (791) technical data sheet, Benjamin Moore
- SHER-WOOD Catalyzed Lacquer (Precat) safety data sheet (T77F37), Sherwin-Williams
- Zinsser B-I-N Primer safety data sheet (product 900, rev. 1/31/2022), Rust-Oleum
- Advance Interior Paint - Semi-Gloss product page, Benjamin Moore